I want to say thanks to all the people who wished me well before and/or congratulated me after the show. It's no exaggeration to say that the online painting community has played a huge part in my return to the hobby and subsequent efforts to update and improve my painting skills. It was fantastic to get to meet and chat to so many other painters 'in the flesh' at GDUK and, along with my success, it went to make the day extra special.
I really need to take and post some finished pics of my winning minis over the next couple of days and I'll be posting a personal account of the big day later this week. But first I need to catch up on all the sleep I've lost through a combination of late night painting, nerves and (last night) over excitement. I'm very very tired but very very happy!

Monday 30 September 2013
Tuesday 24 September 2013
Preparing for GDUK
The last week has been intense with mini painting pretty much taking over my life in the run up to GDUK but all the extra effort seems to be paying off.
So, my Skink is almost finished and my plans are coming together when from the back of the figure cabinet something catches my eye. Those of you with good memories may recall that my Dark Eldar diorama started out as a totally different concept from the finished piece. The very first thing I painted for it was a Hellion and it has been sat in the cabinet ever since.
Because I was keeping my options open for the diorama I never based up the hellion and pretty much forgot about him when the concept moved on. But as the DE dio is finished it seems a shame not to make something out of the hellion. So with just a few days to go project Hellion is underway here at Sproket Towers. I'm keeping things simple not the least due to time but also because it would be easy to go OTT on a base in a fit of Golden Demon frenzy.


Just as the Skink stopped me overworking the diorama this will stop me overworking the Skink. Not that I don't already have enough on my hands with all the finishing touches I've planned!
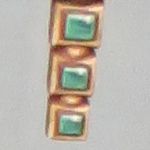
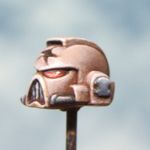
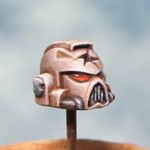
I doubt I'll get round to posting anymore before GDUK (It's this Sunday - there's so little time!!!) so I'm planning a catch up & report after the event. In the mean time here are a few teaser pics some of which may or may not feature things in my GD entries.


So, my Skink is almost finished and my plans are coming together when from the back of the figure cabinet something catches my eye. Those of you with good memories may recall that my Dark Eldar diorama started out as a totally different concept from the finished piece. The very first thing I painted for it was a Hellion and it has been sat in the cabinet ever since.
Because I was keeping my options open for the diorama I never based up the hellion and pretty much forgot about him when the concept moved on. But as the DE dio is finished it seems a shame not to make something out of the hellion. So with just a few days to go project Hellion is underway here at Sproket Towers. I'm keeping things simple not the least due to time but also because it would be easy to go OTT on a base in a fit of Golden Demon frenzy.


Just as the Skink stopped me overworking the diorama this will stop me overworking the Skink. Not that I don't already have enough on my hands with all the finishing touches I've planned!
I doubt I'll get round to posting anymore before GDUK (It's this Sunday - there's so little time!!!) so I'm planning a catch up & report after the event. In the mean time here are a few teaser pics some of which may or may not feature things in my GD entries.

Monday 9 September 2013
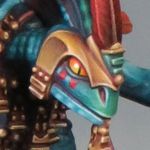
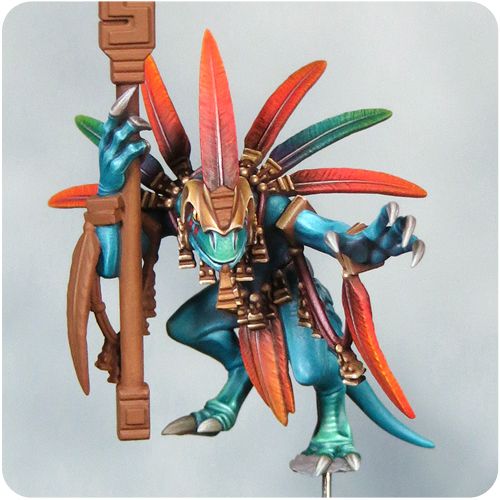
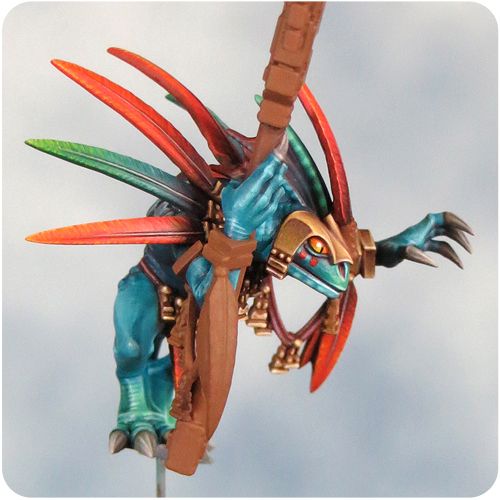
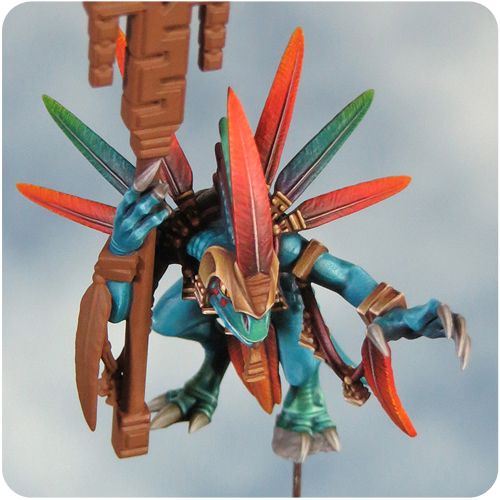
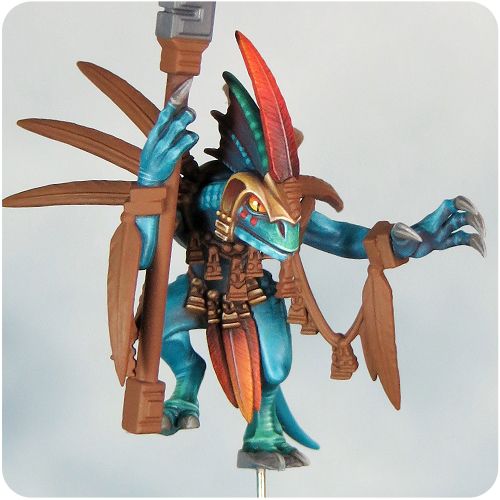
Skink Priest - part 3
I'm two weeks into painting my skink and things seem to be going well. I've never tried to paint a mini in such a short time before & I still have no idea if I can really pull it off but it feels like I'm on track for GDUK.
Painting the skink is turning into quite a different experience for me. I usually take a lot more time to plan everything out and then proceed at a gentle pace, carefully considering each step before I make it. This time around I'm pretty much flying by the seat of my pants. Much to my own surprise I'm really enjoying painting this mini!


Painting the skink is turning into quite a different experience for me. I usually take a lot more time to plan everything out and then proceed at a gentle pace, carefully considering each step before I make it. This time around I'm pretty much flying by the seat of my pants. Much to my own surprise I'm really enjoying painting this mini!
Something else that's very different for me is the way I'm going about the painting. I would normally work each area up to it's finished state before moving on to the next. But this time I'm moving back and forwards between the areas as I work on them. This gives me a bit of extra flexibility to adjust things as I develop my ideas for the colour palette. I'm beginning to think that this mini may have quite an impact on how I paint in the future.

Tuesday 3 September 2013
Skink Priest step-by-step part 1.
In this step-by-step I'll focus on how I painted the flesh areas of my Skink Priest.

The underlying blue tones of the skin are achieved with a relatively simple mix of colours


The underlying blue tones of the skin are achieved with a relatively simple mix of colours
Colour Palette
Unless otherwise stated all the colours I've used come from Games Workshop.
Base Colour:

Sotek Green
Mid tones & Highlights:

Sotek Green + Vallejo Ivory
Shade:

Sotek Green + Evil Sunz Scarlet
Deep Shade:

Sotek Green + Evil Sunz Scarlet + Rhinox Hide
Step 1 Base Colour
First all the flesh areas are given a base coat of Sotek Green. I applied this in several very light coats to preserve as much detail as possible. Sotek Green is a very strong, highly pigmented, colour and, in my opinion, far more of a blue than it is a green.
Step 2 Mid tones & highlights
Working up from the base coat to the highlights is a simply matter of adding increasing amounts of Vallejo Ivory to the Sotek Green. Using ivory instead of white can help to avoid over harsh or chalky looking highlights.
Sotek Green is a strong colour so avoid the temptation to add too much ivory in one go and work in gradual increments. Keeping the tonal changes subtle and working with dilute colour in very thin layers will give you a much smoother graduation. Avoid going too light with the highlights and keep the lightest highlights as small and sharp as you can. Good highlighting will really pull the paint job together and give your mini definition.
Step 3 Shade
Rather than simply using a dark blue/green colour I decided to go for warmer tones in the shade colour. I achieved this with a mix of Sotek Green and Evil Sunz Scarlet. The addition of red to the green first darkened and desaturated it then as more red was added the shade colour took on a purple hue. This is because Sotek Green is, as I said earlier, far more blue than it is green. As more red was added the purple shifted to a warmer tone.
For the very deepest areas of shade I added a little Rhinox Hide to the green/red mix.
All of the shade tones were applied very dilute and built up gradually to keep the effect subtle. Remember it's a lot easier to add a little more shade than it is to take it away!

The Markings
For the green areas on the face and feet I glazed with Sybarite Green over the blue once it had been worked up to a mid tone stage. Next I applied a thin wash/glaze of Kabalite Green. I then built up the highlights with a mix of Sybarite Green and Vallejo Ivory. For the very deepest shadows on these green area I used a Kabalite Green and Coelia Greenshade mix.

For the markings on the crest I wanted to create a softer organic look. To achieve this I worked in thin layers with dilute glazes. The final effect involved a lot of going back and forth between the various colours and shades. It was an effort to resist my natural instinct to keep everything as sharp and defined as possible but I think it payed off. The softer look of the markings looks more fleshy and provides an interesting contrast to the sharper more defined areas.

Later on I'll finish off my step-by-step for the Skink Priest with a description of my method for painting the gold, feathers and jade.
But first I need to get a move on and actually paint those areas - GDUK is fast approaching and there is a lot still to do!
Subscribe to:
Posts (Atom)