
Tuesday 23 July 2013
Dark Eldar Diorama - Work in progress
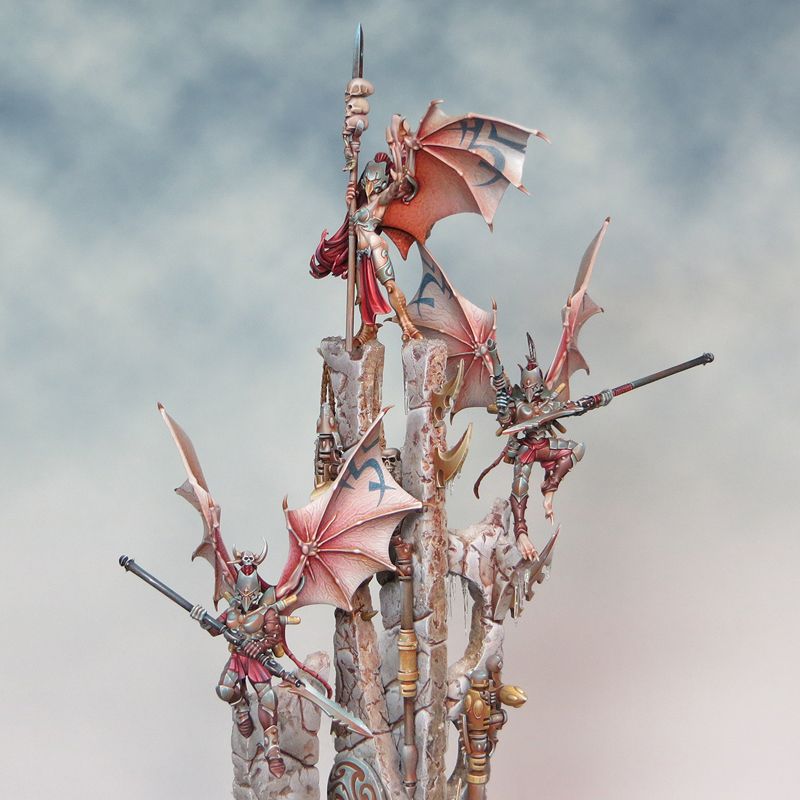
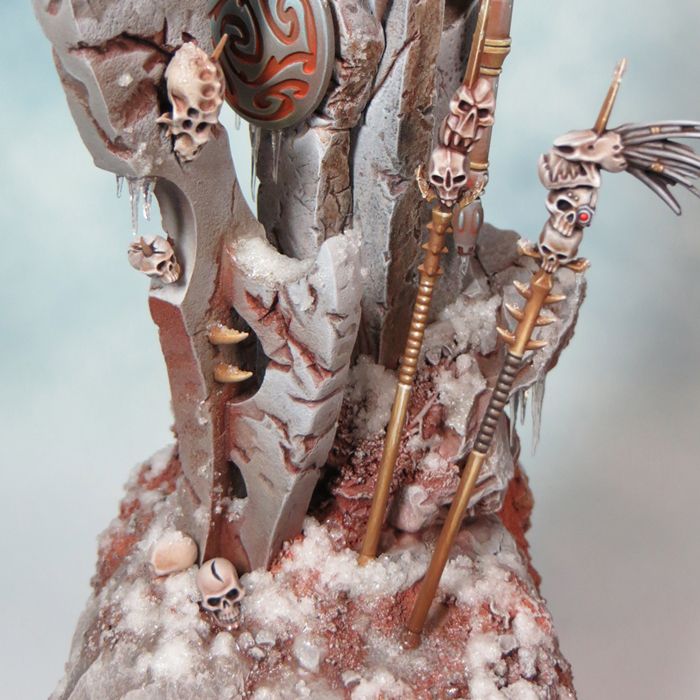
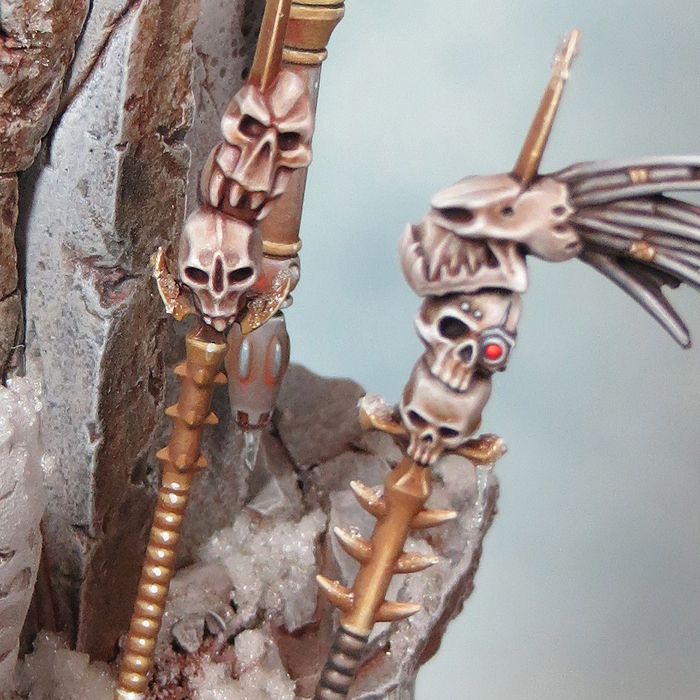
With the bulk of the ice & snow done I've taken the plunge and fixed the Scourge minis onto the spires. I'd planed this well ahead and knew exactly how and where the minis were going but I always find this step a nerve-wracking one. With the Scourge minis in place the overall composition is really coming together and I can now work on the finishing touches.

Thursday 18 July 2013
It's Summertime - lets make some snow!
It's typical, just when I think I'm nearing the end of a big project everything grinds to a crushing halt! First I went and caught a cold in the height of summer and then I developed a chest infection followed by sinusitis. Painting has been the last thing on my mind although recent events could provide inspiration for a Nurgle themed piece (there really has been too much mucus in my life recently!).
On a happier note I'm now well on the road to recovery and so the Dark Eldar Diorama is back on my work bench.
I can't think of a less appropriate time but as the temperature soars and Summer has finally arrived I need to turn my attention to ice and snow effects. I've been planning this step for ages but it's only now that I can implement my ideas as I finally bring the overall composition together. My initial tests with snow and ice effects can be seen below:
Know your Snow!
Ice magic - making icicles
Before starting I gathered together all the materials I thought I might need so everything was to hand.

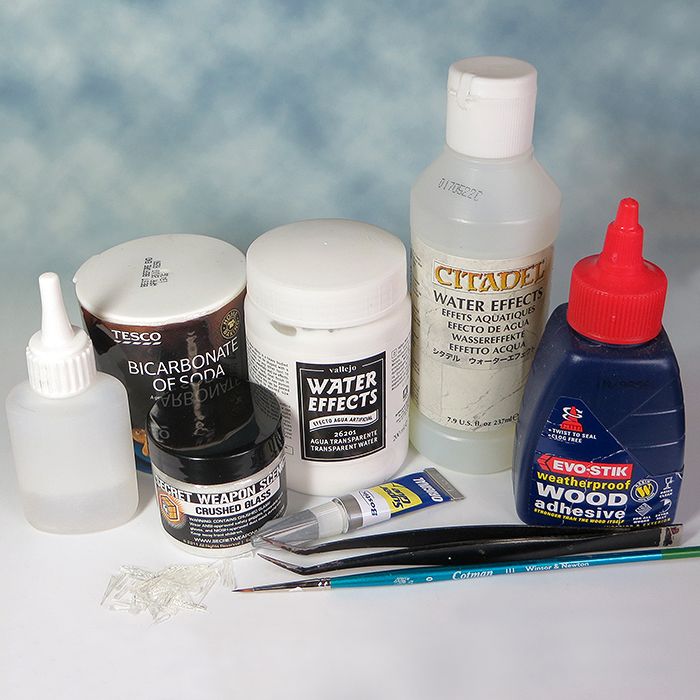
PVA Wood glue
Superglue - regular
Superglue - thick
GW water effects
Vallejo water effects
Crushed glass
Bicarbonate of soda
Tweezers
Icicles (made in advance)
Paintbrush (size 0)
The first step is to fix the icicles onto the base. I only applied a few icicles at a time carefully viewing the piece from all angles as I progressed to make sure I was happy with the composition. I tended to fix the bigger icicles on first and then work down in size to glue the small ones on last.
I applied dot of super glue thick to the base of each icicles and then positioned them using a pair of tweezers. I always made a test fit before applying the glue. Allow the glue to become completley dry before attempting the next step.
next paint on a little water effects to blend the icicle onto the base (and hide any visible super glue). I used a mix of GW and Vallejo water effects for this. I find that this gives me the best combination of flow (GW) and bulk (valejo). As with all water effects this is best built up in careful stages and allowed to dry between each stage as the water effects shrink a little as they dry.


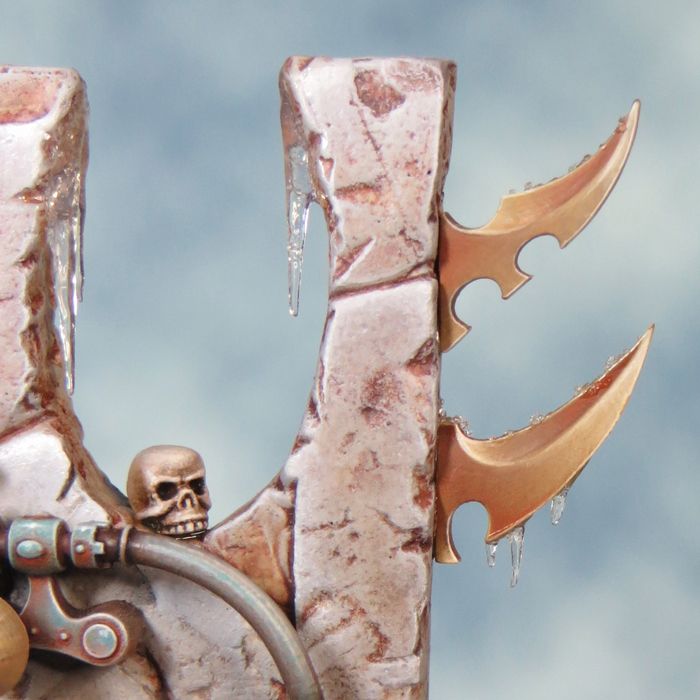
Remember it's easier to add than to take away so it's really very important so take time building up the icicles and blending them onto the base in gradual stages.
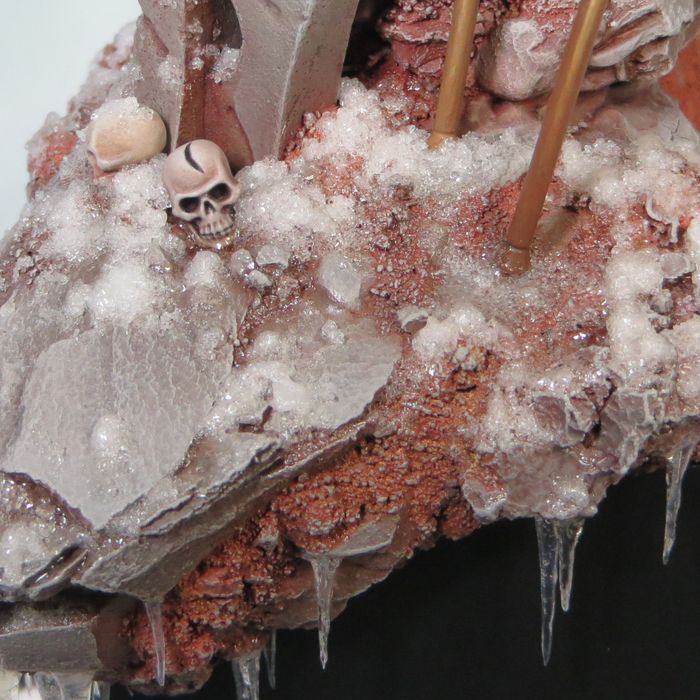
With the icicles sorted it's time to work on the snow. The important thing to remember here is that I'm going for a cold/wet/slushy look to my snow and ice. I had to constantly remind myself of this as I worked. Based on my earlier tests I decided to use a mix of GW water effects and crushed glass. The crushed glass came from Secret Weapon and needs to be used with due regard to health & safety. On no account should you (as I've seen it suggested elsewhere online) attempt to make your own!
I spooned a small amount of the crushed glass into a palette and mixed this with the water effects using a cocktail stick. I used the same cocktail stick to apply the snow mix a little at a time. Once again I'd recommend working in stages and letting each stage dry before you apply the next. This helps to gauge and control the finish as the snow's appearance will change quite a bit (generally becoming whiter and more defined) as the water effects dries.


It can help make the snow look more realistic to vary the mix a little so that some of the snow mix is whetter in places. Applying a little extra water effects so that it forms a few pools & puddles will also add realism & variety. Finally I add tiny amounts of snow to any edges that I want to have a light frosting effect on. This was done with a brush and at times I quite literalt positioned one crystal at a time. It's a fiddly job but worth the effort.

With the icicles sorted it's time to work on the snow. The important thing to remember here is that I'm going for a cold/wet/slushy look to my snow and ice. I had to constantly remind myself of this as I worked. Based on my earlier tests I decided to use a mix of GW water effects and crushed glass. The crushed glass came from Secret Weapon and needs to be used with due regard to health & safety. On no account should you (as I've seen it suggested elsewhere online) attempt to make your own!
I spooned a small amount of the crushed glass into a palette and mixed this with the water effects using a cocktail stick. I used the same cocktail stick to apply the snow mix a little at a time. Once again I'd recommend working in stages and letting each stage dry before you apply the next. This helps to gauge and control the finish as the snow's appearance will change quite a bit (generally becoming whiter and more defined) as the water effects dries.
Subscribe to:
Posts (Atom)